
Nvidia Cosmos 3: four open world models simulate traffic and robot arms
Nvidia has released four new models in its Cosmos 3 family with freely downloadable weights. They generate synchronized camera and LiDAR data for self-driving cars, or predict how a scene changes when a two-armed robot moves. For robotics and automotive developers, it's an open toolkit for simulation. For hobbyists, though, the hardware bar is high.
What's going on
On November 5, 2026, Nvidia released four new models for its Cosmos platform. Cosmos is Nvidia's collection of so-called world models. These are AI systems that predict how a scene in the real world will unfold, say when a car turns or a robot arm reaches for an object. The four new checkpoints (fully trained model snapshots) belong to the Cosmos 3 family and are post-trained offshoots of the Cosmos 3 Nano base model. Each has 16 billion trainable parameters.
The weights are available for download on Hugging Face. Nvidia says the OpenMDW 1.1 license permits commercial and non-commercial use within its terms. There's also a technical report, demos, notebooks and so-called agent skills: instructions an AI coding assistant can work through to get the models running.
The four models at a glance:
| Model | Input | Output | Use case |
|---|---|---|---|
| Cosmos3-Nano-Transfer-Auto | Scene maps, text, optional initial frames | Video from up to 11 cameras + LiDAR | Generate synthetic driving data offline |
| Cosmos3-Nano-Sim-Auto | Driving controls, scene maps | Streamed camera and LiDAR data | Interactive driving simulation |
| Cosmos3-Nano-Sim-Transfer | Simulator data (depth, segmentation, edges, blur) + text | Photorealistic video | Make a physics simulator look real |
| Cosmos3-Nano-Sim-Bimanual | Initial frame + robot or camera motions | Predicted video | Simulating two-armed robots |
Why you'd need this
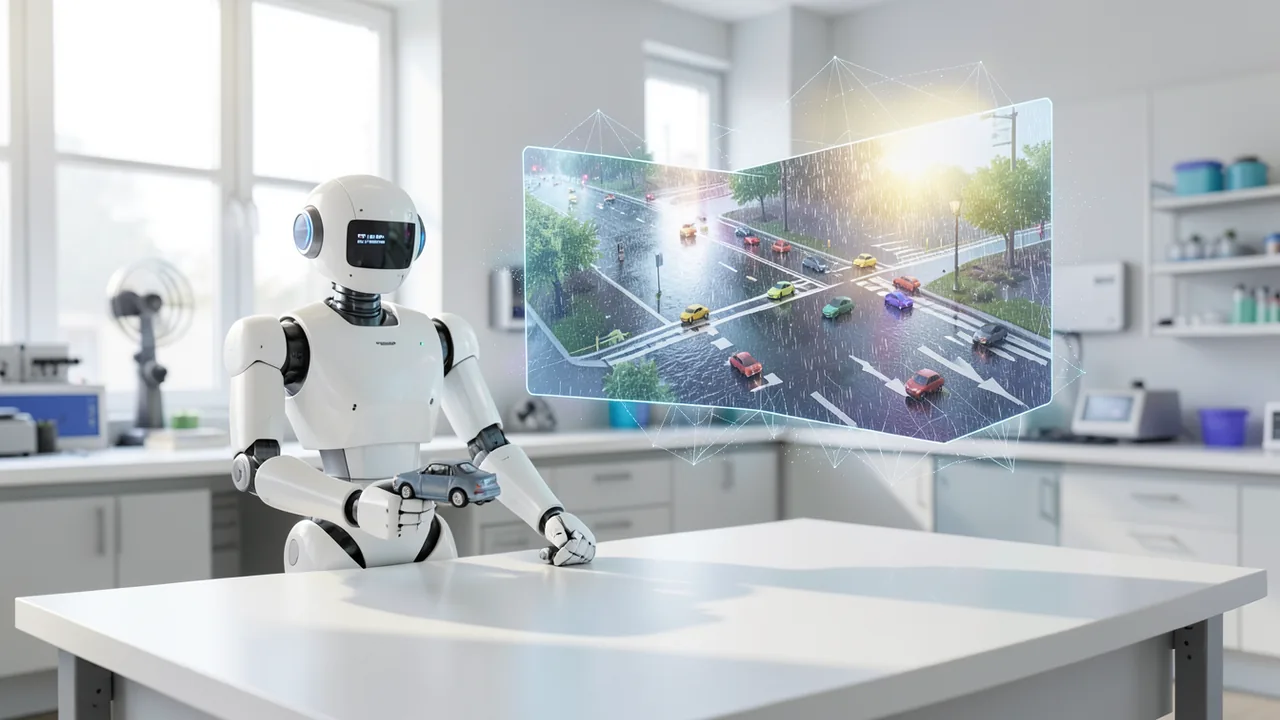
Robots and self-driving cars learn from data. But nobody wants to re-stage dangerous or rare situations, like a nighttime drive in heavy rain, hundreds of times on real roads. World models are meant to generate such situations convincingly. A robot's or car's control software, known in the jargon as a policy, can then be trained and tested in simulation before it goes onto real hardware.
In autonomous driving, appearance and geometry have to match. If the camera shows a car, the LiDAR sensor (a laser scanner that measures distances and builds a 3D point cloud from them) has to see that car in the same spot. That's why the automotive models generate both in sync. Using controls for the scene and traffic lights, researchers can change road layouts and signal states and watch how the driving software reacts.
The automotive models: from offline data to live simulation
Transfer-Auto is a so-called bidirectional model. It processes an entire clip at once and is allowed to look "into the future" while doing so. That makes it precise, but not interactive. It generates synchronized video from up to 11 camera views, including fisheye cameras, plus LiDAR data on request. It's controlled via World Scenario Maps (WSM), per-camera maps that define the road layout and traffic movement. A text prompt sets the look: weather, lighting, time of day. Optionally, real initial frames anchor the appearance of the scene. For LiDAR, control data from high-definition maps (HD maps) is added.
According to Nvidia's developer blog from November 2, as reported by blockchain.news, Transfer-Auto processes video at 30 frames per second, up to 400 frames in 480p or 720p. Longer sequences come from the model continuing to compute piece by piece. A reference run produces seven 720p videos with 297 frames each, plus 99 LiDAR scans.
Sim-Auto is the streaming version. Nvidia slimmed down Transfer-Auto via distillation, letting a faster "student" model learn from a slower "teacher". Sim-Auto generates small, consecutive chunks of camera and LiDAR data in just a few compute steps. It uses its own previous output as memory and takes updated driving commands into account. A true closed loop, where the driving software steers and the model delivers the next frames, also requires a simulation environment and a WSM renderer, though. The model doesn't ship with those.
Nvidia recommends a fixed path: if you have your own camera rigs or LiDAR sensors, first post-train Transfer-Auto on your own data, then distill it into your own Sim-Auto variant.
The robotics models: two opposite approaches
Sim-Transfer doesn't simulate physics itself. A classic physics simulator computes motion, contacts and states. Sim-Transfer takes its spatial auxiliary data and turns it into photorealistic frames that robot software can process. The control inputs are depth maps (distance to the camera), segmentation (which image regions belong to which object), edges (outlines) and a blurred rough template for layout and appearance. The text sets the look; the physical ground truth stays with the simulator.
Sim-Bimanual takes the opposite route and generates the next frame directly from the scene and robot motion, with no simulator in between. It supports two-armed robots of the YAM and AgiBot types. Control comes from a policy or from humans with joysticks. You start with a frame, move the robot or camera, and get the following frames predicted. A control sequence can switch between camera pans and grasping motions. The example uses 59 control values, padded to 64 during training. A published schema defines coordinate systems, rotations, gripper calibration and value ranges. Timing matters: for T motion steps, you need T+1 frames.
How the streaming works
Cosmos 3 is built on a Mixture-of-Transformers architecture: separate networks for text processing and image generation are connected via attention, the mechanism a model uses to decide which information matters right now. The model works with latents, compressed video representations. After the initial frame, each latent time step represents four actual video frames.
The flow: control data and history go in, the model generates a short chunk, it gets decoded into frames and appended to the history. During denoising, noisy data is gradually turned into a clean chunk. Temporally causal attention ensures the model only sees the past and can't peek into the future. A key/value cache stores intermediate results so they don't have to be recomputed every time. The smaller the chunks, the more often new commands can feed in.
Training runs in four stages:
- Stage 0: The model learns the new domain from complete clips.
- Stage 1 (teacher forcing): It predicts each chunk from real earlier footage.
- Stage 2 (consistency distillation): A frozen teacher model trains a student that gets by with four denoising steps.
- Stage 3 (self-forcing): The student trains on its own self-generated history.
The last stage is crucial. A slightly mispredicted object becomes the basis for every following frame, so errors compound. Self-forcing confronts the model with this problem during training. Nvidia also stresses that a successful short training run only proves the code works, not that the model has learned anything good.
What you need to try it
This isn't a model for your gaming PC. Nvidia lists Linux, an Nvidia GPU, Docker and the NVIDIA Container Toolkit as prerequisites. The published vLLM-Omni setup was tested on a single GB200, a data center chip. Nvidia stresses that this isn't a minimum requirement. According to the memory table reported by blockchain.news, Cosmos3-Nano needs 58 GiB of VRAM for video generation in BF16, 44 GiB in FP8 (lower-precision numbers) and 31 GiB with FP8 plus offloading to system RAM. Realistically, that means pro cards with 48 GB or more, or a rented cloud server. An RTX 4090 with 24 GB isn't enough by these numbers. It won't run on a Mac or CPU-only, and it's too big for free Google Colab. If you just want something small running locally, Pulse 2.0 says you're better served by the also-announced Cosmos 3 Edge (4 billion parameters, for Jetson Thor).
The bigger package
According to DotAI Times, the models are part of a larger announcement Nvidia made at GTC Berlin. It includes the Cosmos Framework for training, reinforcement learning and optimization, which also supports third-party models such as GR00T, Qwen and pi0.5, plus the Cosmos Data Factory with five blueprints for synthetic data. Nvidia says the revamped Cosmos NIM microservices run up to twice as fast. As real-world examples, Nvidia cites Porsche, which aims to cut real test drives by up to 90 percent, and Siemens, with 40 percent less calibration time in circuit board inspection. DotAI Times notes that these are individual cases that don't necessarily carry over elsewhere.
The big picture
The four checkpoints aren't flashy showcase models. They're tools for robotics and automotive professionals. What stands out is the openness: alongside the weights, Nvidia is publishing the complete post-training recipes. That lowers the barrier for companies and research groups that can't build their own simulations from scratch. It also fits Nvidia's strategy: open models that run best on Nvidia hardware sell GPUs.
The core question, which Nvidia itself openly acknowledges, remains: how well does a generated world actually hold up when you use it to train and evaluate robots or cars? Solid independent measurements are still missing. For individual users, the whole thing is barely usable given its memory requirement of more than 30 GB.
Related videos
Sources
- Hugging Face Blog huggingface.co
- Merkliste: ecosistemastartup.com ecosistemastartup.com
- blockchain.news blockchain.news
- note.com note.com
- technobezz.com technobezz.com
Try it yourself: Cosmos3-Nano (Transfer-Auto, Sim-Auto, Sim-Transfer, Sim-Bimanual)
Explained step by step, no prior knowledge needed – on your own computer or free in your browser.
What can I do with it?
The four Cosmos 3 Nano checkpoints generate video that matches given control data. Transfer-Auto turns road-scene maps and a text prompt into synchronized video from up to 11 camera views plus LiDAR data, such as the same intersection in rain, at night or at sunset. Sim-Auto delivers that as a stream in small chunks for interactive driving simulation, but needs its own simulation environment to do so. Sim-Transfer turns rough simulator frames like depth or segmentation maps into photorealistic video. Sim-Bimanual predicts what a scene looks like when a two-armed robot (YAM or AgiBot) or the camera moves. These models are specialist tools for robotics and automotive research, not a general-purpose video generator like Sora or Veo. How reliable the generated worlds are for training real robots is, by Nvidia's own account, still an open question.
Who is it worth it for?
Worth it for robotics and autonomous driving teams, research groups and students with access to large data center GPUs who need synthetic training data or simulations. Not really for hobbyists with a regular gaming GPU, Mac users, or people who just want to make pretty videos.
Ideas: What you can do with it
Take a recorded road scene and have Transfer-Auto generate versions in rain, fog, at night or at dusk via a text prompt. That gives you training and test data for rare conditions without heading out to record it.
Export depth or segmentation videos from your physics simulator and have Sim-Transfer turn them into realistic frames. Your robot software then trains on images that are closer to real camera footage.
With Sim-Bimanual, you provide an initial frame and a motion sequence for a two-armed robot and see as video how the scene would respond. It's good for quick experiments before you touch real hardware.
Combined with a simulation environment, Sim-Auto continuously delivers camera and LiDAR frames that your driving software reacts to. That lets you vary traffic light states or road layouts repeatably.
Students and researchers can use the open recipes to study how errors compound in long predictions and compare their own improvements against Nvidia's baseline.
What your computer needs
For offline driving data, use Transfer-Auto. For interactive streamed driving simulation, use Sim-Auto. If you have a physics simulator and want realistic frames, Sim-Transfer is the right pick. For two-armed robots without a simulator, use Sim-Bimanual. For video generation, Nvidia lists 58 GiB of VRAM in BF16, 44 GiB in FP8 and 31 GiB with FP8 plus offloading. So with a 48 GB card, go with FP8; with less memory, FP8 plus offloading. According to reports, the separate Cosmos 3 Edge with 4 billion parameters is intended for edge devices.
- Prerequisites according to Nvidia: Linux, an Nvidia GPU, Docker and the NVIDIA Container Toolkit.
- The official vLLM-Omni setup was tested on a single GB200. Nvidia explicitly says that's not a minimum requirement.
- Memory needed for video generation: 58 GiB (BF16), 44 GiB (FP8), 31 GiB (FP8 with offloading).
- Consumer cards with 24 GB aren't enough by these numbers. Plan on pro cards with 48 GB or more, or a cloud server.
- Not designed to run on a Mac or CPU-only. The model is too big for free Google Colab.
- Long videos and many camera views plus LiDAR significantly increase compute and memory requirements.
How do I find out what my computer has?
- Windows: Press Ctrl + Shift + Esc → Task Manager → Performance tab → click GPU on the left. At the bottom you'll see Dedicated GPU memory (that's your VRAM). You'll find system memory under Memory.
- Mac: Apple menu at the top left → About This Mac. You'll see your chip (e.g. M2) and memory (e.g. 16 GB). On Apple chips, graphics and processor share this memory.
- Linux: Type
nvidia-smiin the terminal (shows your graphics card and its memory) andfree -hfor system memory.
Guide
This model runs with its developers' own program (nvidia/cosmos on GitHub). The commands below come from the Model Card and the developers' instructions.
In the browser (no installation)
The developers have an online demo on Hugging Face. You can try the model right away there without installing anything. Sometimes you have to wait a moment for the demo to wake up.
Windows 10 / 11
Windows 10 / 11: not supported. According to NVIDIA, Cosmos3-Nano officially runs only on Linux with a powerful NVIDIA GPU. On Windows, you can set up WSL2 (Linux built into Windows) with Ubuntu and follow the Linux guide there. That's not officially tested, though. Without suitable hardware, you can use the free browser demo on build.nvidia.com (cosmos3-nano).
macOS
macOS: not supported. The model needs an NVIDIA GPU with CUDA (Ampere, Hopper or Blackwell), and only Linux is officially supported. Macs don't have NVIDIA GPUs. Use the browser demo on build.nvidia.com instead (cosmos3-nano for video, cosmos3-nano-reasoner for image understanding), or rent a Linux cloud machine with an H100.
Linux
Linux: supported. Officially supported: Linux with NVIDIA GPUs from the Ampere, Hopper or Blackwell generations. NVIDIA lists the RTX Pro 6000, H100 or B200; only BF16 has been tested. Regular gaming cards with 24 GB or less aren't enough. For weaker hardware, there's the smaller Cosmos3-Edge (4B) or the FP8 variant Cosmos3-Nano-FP8.
- Check the prerequisites. You need Linux and an NVIDIA GPU with about 43 GB of VRAM (video memory), such as an RTX Pro 6000 or H100. Install a recent NVIDIA driver. If `nvidia-smi` shows your card, you're good. Also plan for at least 70 GB of free disk space. As the install tool, you need uv, a fast Python package manager. uv downloads Python 3.13 by itself if needed.
nvidia-smi pip install uv - Request access to the guardrail model. Cosmos checks your inputs with a safety filter (guardrail). It lives in a gated repo. Sign in at huggingface.co and open the nvidia/Cosmos-1.0-Guardrail page. Accept the terms of use there and wait for approval. Then create a token with read permissions (Read) under Settings → Access Tokens. You'll need it later.
- Create a folder and environment. Create a dedicated folder and set up a virtual environment inside it. That's an isolated space for the Python packages. The command comes from NVIDIA's guide. If it worked, you'll see (.venv) in front of your prompt.
mkdir cosmos3 && cd cosmos3 uv venv --python 3.13 --seed --managed-python && source .venv/bin/activate - Install the packages. This command installs PyTorch to match your GPU (that's what `--torch-backend=auto` takes care of). It also installs the latest Diffusers version straight from GitHub, plus other helper packages for video and the guardrail. This takes a few minutes.
uv pip install --torch-backend=auto \ "diffusers @ git+https://github.com/huggingface/diffusers.git" \ accelerate av cosmos_guardrail huggingface_hub imageio imageio-ffmpeg \ torch torchvision transformers - Log in to Hugging Face. Log in with your read token. Paste the token when prompted. Logging in alone isn't enough: your account must have been approved for the guardrail repo from step 2.
uvx hf@latest auth login - Download the model in advance (optional). The model is about 35 GB. You can download it in advance so you can see the progress. If you skip this step, the script downloads the model automatically on first run.
hf download nvidia/Cosmos3-Nano - Create the script. This command creates the file first_video.py with NVIDIA's example. The script loads the model onto the GPU in BF16. It then generates a video from the sentence about a warehouse robot and saves it at 24 frames per second.
cat > first_video.py << 'EOF' import torch from diffusers import Cosmos3OmniPipeline from diffusers.utils import export_to_video pipe = Cosmos3OmniPipeline.from_pretrained( "nvidia/Cosmos3-Nano", torch_dtype=torch.bfloat16, device_map="cuda" ) video = pipe(prompt="A mobile robot navigates a warehouse aisle and stops at a shelf.").video export_to_video(video, "first_video.mp4", fps=24) EOF - Generate your first video. Run the script in the activated environment. The computation is very heavy, so long waits per step are normal. If the script finishes without errors, the folder will contain first_video.mp4. You can open it with any video player. If you see a message like "out of memory", your VRAM isn't enough.
python first_video.py - Result. The cosmos3 folder contains the file first_video.mp4: a short video of a robot driving down a warehouse aisle.
What to do after your first result
- Change the text after prompt= in first_video.py. Describe your own scene there in English and rerun the script.
- NVIDIA's cookbooks (COOKBOOK.md in the github.com/nvidia/cosmos repo) show more modes: images, audio, image-to-video, control via robot motions and the Reasoner for image understanding.
- The specialized variants Cosmos3-Nano-Transfer-Auto, -Sim-Auto, -Sim-Transfer and -Sim-Bimanual are separate models based on Nano. You'll find their recipes in the cookbook under "Simulation".
- Without your own hardware, try everything first in the browser demo on build.nvidia.com. For your own server with an OpenAI-compatible API, the serving guide has instructions for vLLM-Omni and SGLang.
Try it
Sim-Transfer notebook: depth video of a robot arm plus the prompt "A robot arm reaches for a red mug in a brightly lit kitchen, wooden countertop, daylight"Transfer-Auto with sample WSM: "Suburban street in heavy rain at night, wet road reflecting streetlights"The same scene again with "Sunny autumn afternoon, leaves on the sidewalk, low sun" to compare the weather variantsSim-Bimanual with an initial frame: first pan the camera left, then close both grippers, and check whether the scene stays consistentSim-Auto: start the reference rollout "daytime_scene" and compare the generated camera videos with the LiDAR scansTips for better results
- Start with the official notebooks and sample data before feeding in your own data.
- Give your coding agent the official agent skill and the path to your data. That way environment checks and sample validation run automatically.
- With Transfer-Auto, optional real initial frames anchor the scene's appearance and make results more stable.
- Evaluate quality on held-out episodes that weren't in the training data. A short successful run only shows that the code works.
- Before long training runs, test resuming after an interruption so you don't lose progress.
If something goes wrong
Without Docker and the NVIDIA Container Toolkit, the official setup won't start. Install both before your first attempt.
Sim-Auto alone doesn't give you an interactive simulation. For a closed loop, you need a simulation environment and a WSM renderer.
With Sim-Bimanual, you have to follow the action schema exactly (coordinate systems, rotations, gripper calibration). Also, T motions need T+1 frames. The bundled inference actions are already normalized.
For your own camera rigs, post-train Transfer-Auto first and then distill. Starting directly with Sim-Auto isn't the intended path.
Keep the full checkpoints during training. The exported inference weights don't include optimizer state, so you can't resume training from them.
The server downloads the weights at startup. Plan for enough disk space and bandwidth.
“out of memory,” a crash, or your computer freezes
The model is too big for your VRAM (video memory). Pick a smaller variant from the table above and close other programs, especially games and browsers with lots of tabs.
It runs, but extremely slowly
Your CPU is probably doing the work instead of your graphics card. In Ollama, the PROCESSOR column of ollama ps shows how much runs on the GPU. If it says "100% CPU", update your graphics driver or pick a smaller variant that fits entirely into VRAM (video memory).
“ollama” or “python” is not found
Close the terminal window and open it again so it recognizes the newly installed program. For Python on Windows: reinstall it and check Add python.exe to PATH.
Windows: "Running scripts is disabled on this system"
Run the script with exactly the command above: powershell -ExecutionPolicy Bypass -File try_windows.ps1. This allows execution for this one time only.
Error message when loading the model (version, "trust_remote_code", unknown architecture)
Brand-new models often need the latest software version. With Ollama: update Ollama. With Python: pip install -U transformers in the activated environment. The Model Card usually lists the exact version.
Tokenstrom generates the scripts and notebook automatically. Please take a quick look before running them – they're plain, readable text. Mind the model's license: custom license (see Model Card).
Ask the AI assistant
Questions about this article, installation or background? Our assistant knows this page and runs on our own machine, not in someone else's cloud.
The Assistant is an AI (Gemma 4) and can make mistakes – please check important details against the source. Questions are used only to generate an answer and are deleted after one hour. Please don't enter any personal data.



Comments
What do you think? Already tried it? Write it here, no sign-up needed.
Comments are public. Links aren't allowed, and we delete abusive posts. You can delete your own comment at any time in this browser. Learn more in the Privacy Policy.