
Vimoo-1.0-Lite: open video model turns text and images into clips
The Vimoo-AI team has released the weights of its video model Vimoo-1.0-Lite for ComfyUI. A single model with about 9.5 billion parameters generates video from text or animates a starting image, under the permissive Apache 2.0 license, which also allows commercial use.
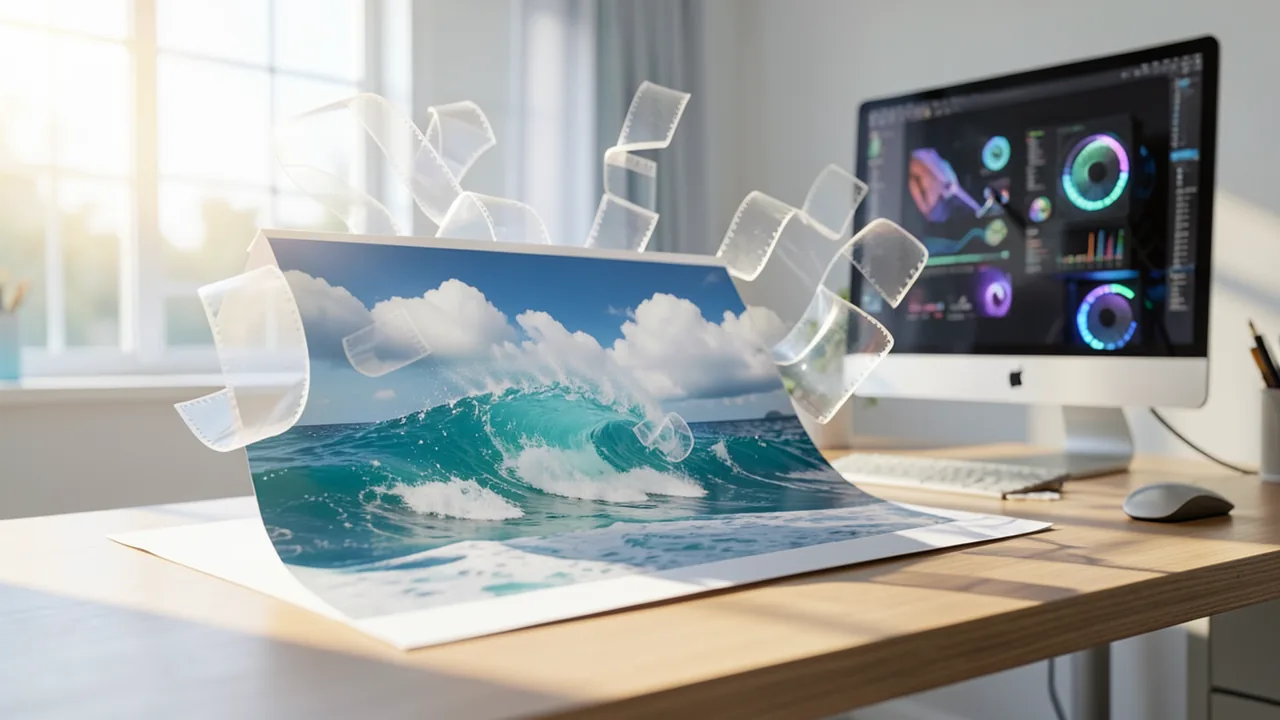
What's going on
A new freely downloadable video model called Vimoo-1.0-Lite has appeared on Hugging Face. It comes from the Vimoo-AI team, which says it released its "Vimoo 1.0" model family in October 2026, along with an online API, examples for the Python library Diffusers, and workflows for ComfyUI. The repository Vimoo-1.0-Lite-ComfyUI, now making the rounds in the community (including the r/StableDiffusion subreddit), contains everything you need to run the model in ComfyUI. That's the node-based interface where you snap image and video generators together like building blocks.
What stands out: a single model with about 9.5 billion parameters does two jobs. It generates videos from a text description (text-to-video, or T2V) and brings an existing still image to life (image-to-video, or I2V). Hence the "TI2V" in the name. The weights are released under the Apache 2.0 license, one of the most permissive open-source licenses around.
What's in the package
The repository ships not just the video model itself but all the supporting components:
| File | Purpose |
|---|---|
| vimoo_v1_lite_bf16 | the video diffusion model itself (≈ 9.5B parameters, BF16) |
| vimoo_v1_qwen2_5_vl_7b_bf16 | text encoder based on Qwen2.5-VL 7B: turns the prompt into a form the model understands |
| vimoo_v1_glyph_byt5_fp32 | second text encoder (ByT5), judging by the name meant for glyphs, i.e. text inside the image |
| vimoo_v1_siglip_so400m_fp16 | SigLIP vision encoder: "reads" the starting image in I2V mode |
| vimoo_v1_wan22_ti2v_vae_fp32 | VAE: compresses video frames into a compact form and unpacks them again at the end |
| vimoo_v1_ti2v_distilled_lora_fp32 | optional distilled LoRA adapter |
The VAE's file name is telling: it points to the "Wan 2.2 TI2V" VAE from Wan 2.2, the well-known Chinese open-source video model. How much more of Vimoo builds on Wan isn't clear from the source. Vimoo describes the architecture and evaluation in a separate main repository.
The distilled LoRA adapter is a small add-on file that sits on top of the base model. Distillation means training a model to deliver similar results in fewer compute steps, a bit like a chef who has made a recipe so often they know the shortcuts. The distilled variant runs with fixed settings and CFG 1. CFG (classifier-free guidance) controls how strictly the model follows the prompt. At CFG 1, the extra pass with the negative prompt is skipped, which typically saves time. The developer doesn't give any concrete speed figures on the ComfyUI page, though.
What it generates
The default workflows produce 121 frames at 24 frames per second, so just over five seconds of video. For text-to-video, the default resolution is 1280 × 720 pixels. In image-to-video mode, the "resolution=auto" setting fits the starting image's aspect ratio to a pixel budget of 1280 × 720 and rounds both sides down to multiples of 16. A square image gives you 960 × 960 pixels, and a 9:16 portrait image gives you 720 × 1280, which is handy for short-form video. You can also enter width and height manually. The starting image is scaled to the output size and center-cropped.
In the standard workflow you can adjust the number of steps and the text CFG. The distilled workflow keeps its values fixed. Finished videos land in the ComfyUI/output/ folder.
There's one important limitation when prompting: the open models were only validated with English prompts. Vimoo explicitly recommends translating prompts in other languages into English first. Beyond that, the more precisely you describe the subject, scene, action and camera movement, the closer the result gets to what you had in mind. The automatic prompt enhancement used by Vimoo's online service isn't available locally. Your text is used exactly as you enter it.
Requirements and pitfalls
The requirements are fairly recent and tightly specified:
- ComfyUI 0.34.0 or later
- Python 3.10 or later
- PyTorch 2.9.0 with CUDA 13.0 (cu130), torchvision 0.24.0, torchaudio 2.9.0, plus a matching, up-to-date Nvidia driver
- an Nvidia GPU with CUDA
The nodes come from the separate ComfyUI-Vimoo package on GitHub, which also includes the workflow templates. Important: every weights file comes with a JSON metadata file (supported tasks, matching base model, sampling settings). It has to stay in the same folder, or the nodes won't work properly.
Inference has to run in BF16. The model loader rejects FP16 and FP32. For attention (the part of the model that relates image regions to one another), PyTorch's built-in SDPA is active by default. Faster alternatives such as FlashAttention 2/3/4 or SageAttention are optional. For the Diffusers examples, Vimoo recommends a separate Python environment because the Transformers library versions clash.
What you need to try it
The model page doesn't list official VRAM (video memory) requirements, but you can do a rough calculation: the video model alone takes up about 19 GB in BF16, and the Qwen2.5-VL-7B text encoder another 15 GB or so. There's no official smaller (quantized) version and no GGUF files yet. Realistically, then, you'll want an Nvidia card with at least 24 GB of VRAM (such as an RTX 3090, 4090 or 5090), with ComfyUI temporarily offloading the text encoders to system RAM. The ComfyUI-Vimoo README describes the memory options. Make sure you have 32 GB of RAM or more and around 45–50 GB of free disk space. AMD cards, Apple Silicon Macs and CPU-only setups aren't supported: a CUDA GPU is an explicit requirement. Rented cloud GPUs with 24 to 48 GB are a good way to test it, though.
The bigger picture
Open video models that combine text-to-video and image-to-video in a single checkpoint are still not a given, and the Apache 2.0 license is a real advantage over models with restrictive terms of use. At 9.5 billion parameters, Vimoo-1.0-Lite sits between small models like Wan 2.2 5B and large ones like HunyuanVideo or Wan 2.2 14B. Output at 720p and 24 fps is solid for a model you can run locally.
A lot remains open: you can't tell from the ComfyUI page how the quality stacks up against the competition. Vimoo points to its main repository for benchmarks, and there are no independent tests yet. Little is known about the team behind Vimoo-AI, either. In practice, the strict software requirements (CUDA 13.0, PyTorch 2.9.0), the BF16 requirement and the lack of smaller quantizations are obstacles that shut out owners of mid-range GPUs for now. The community often fills that gap, but until then Vimoo-1.0-Lite is mainly for people with powerful hardware.
Sources
- Reddit r/StableDiffusion huggingface.co
Try it yourself: Vimoo-1.0-Lite TI2V
Explained step by step, no prior knowledge needed – on your own computer or free in your browser.
What can I do with it?
Vimoo-1.0-Lite generates short video clips of just over five seconds (121 frames at 24 fps) at up to 1280 × 720 pixels. You can either describe a scene in English and turn it into a video, or upload your own photo and have it animated. The same model handles both tasks: you simply pick the mode in the input node. Portrait images automatically produce portrait videos (720 × 1280), square images 960 × 960. A distilled variant with fixed settings is meant for faster results. Limitations: it was only tested with English prompts, the clips are short, and there are no independent quality comparisons with Wan 2.2 or HunyuanVideo yet.
Who is it worth it for?
Worth it for hobby filmmakers, content creators and ComfyUI users with a powerful Nvidia card (roughly 24 GB of VRAM or more) who want a freely licensed video model they can also use commercially. If you only have a Mac, an AMD card or a GPU with 8–12 GB, wait until the community releases smaller versions.
Ideas: What you can do with it
Upload a beach or mountain photo in image-to-video mode and describe in English what should move, such as waves, clouds or trees in the wind. You get a clip of just over five seconds that works as an animated wallpaper or in a slideshow.
Use a 9:16 image as the starting frame, and the model automatically creates a 720 × 1280 pixel vertical video. That's how you get short loops for Reels, Shorts or status updates.
Describe film scenes in text, camera moves included, and render several variations. That lets you quickly visualize ideas for a short film or music video before you shoot anything.
Photograph a product and have it showcased with a slow camera move or soft lighting. Thanks to the Apache 2.0 license, you can use the results commercially too.
Generate atmospheric filler shots like steaming coffee, rain on a window or city traffic at night. Clips like these work as cutaways in YouTube videos or talks.
What your computer needs
There's only one checkpoint (BF16, about 9.5B parameters), and it covers both text-to-video and image-to-video. Choose the vimoo_v1_ti2v_lite.json workflow if you want to set steps and CFG yourself and get maximum quality. Choose vimoo_v1_ti2v_lite_distilled.json plus the distilled LoRA if you want speed, in which case the sampling settings stay fixed. There are no official quantized or GGUF versions yet.
- You need an Nvidia GPU with CUDA. AMD, Apple Silicon and CPU-only setups aren't supported.
- There are no official VRAM figures. As a rough estimate, the video model (~19 GB) and the Qwen2.5-VL-7B text encoder (~15 GB) together take up over 30 GB in BF16, so 24 GB of VRAM with offloading to system RAM is a realistic minimum.
- At least 32 GB of RAM is recommended so ComfyUI can offload the encoders.
- Plan for about 45–50 GB of free disk space for all the files.
- You need an Nvidia driver that supports CUDA 13.0. Older drivers won't do.
- Higher resolutions and more frames cost more memory. If you run out, lower the resolution or frame count first.
How do I find out what my computer has?
- Windows: Press Ctrl + Shift + Esc → Task Manager → Performance tab → click GPU on the left. At the bottom you'll see Dedicated GPU memory (that's your VRAM). You'll find system memory under Memory.
- Mac: Apple menu at the top left → About This Mac. You'll see your chip (e.g. M2) and memory (e.g. 16 GB). On Apple chips, graphics and processor share this memory.
- Linux: Type
nvidia-smiin the terminal (shows your graphics card and its memory) andfree -hfor system memory.
Guide
This model runs with its developers' own program (Vimoo-AI/ComfyUI-Vimoo on GitHub). The commands below come from the Model Card and the developers' instructions.
Windows 10 / 11
Windows 10 / 11: not officially tested. The source only requires an NVIDIA GPU with CUDA 13.0 and doesn't name an operating system. Windows isn't mentioned explicitly. ComfyUI generally runs on Windows, so the Linux steps have been adapted to PowerShell here. Without an NVIDIA card, it won't work.
- Check the requirements. You need an NVIDIA GPU, a current NVIDIA driver that supports CUDA 13.0, Python 3.10 or later, and Git. CUDA is NVIDIA's compute interface that lets the model run on the GPU. Also plan for about 45 GB of free disk space for the model files. In PowerShell, "nvidia-smi" shows the CUDA version your driver supports in the top right. It should say 13.0 or higher.
nvidia-smi python --version git --version - Download ComfyUI. ComfyUI is the program you use to run the model. Its interface runs in your browser. The command downloads ComfyUI into a folder called "ComfyUI", and "cd" switches into that folder. Run all the following commands from there.
git clone https://github.com/Comfy-Org/ComfyUI cd ComfyUI - Create a Python environment. A virtual environment (venv) is an isolated folder for Python packages, so nothing gets mixed up with other programs. If activation worked, you'll see "(.venv)" in front of your prompt. If Windows says scripts are blocked, run "Set-ExecutionPolicy -Scope CurrentUser RemoteSigned" once and then activate again.
python -m venv .venv .venv\Scripts\Activate.ps1 - Install PyTorch with CUDA 13.0. PyTorch is the compute library the model runs on. The source requires exactly these versions for CUDA 13.0. After that, install the remaining packages ComfyUI itself needs. The download is several gigabytes and takes a while.
python -m pip install "torch==2.9.0+cu130" "torchvision==0.24.0+cu130" "torchaudio==2.9.0+cu130" --index-url https://download.pytorch.org/whl/cu130 python -m pip install -r requirements.txt - Install the Vimoo extension. The ComfyUI-Vimoo extension provides the Vimoo building blocks (nodes) and ready-made workflows. It goes into the "custom_nodes" subfolder. Install its packages in the same activated environment, or the nodes won't show up later.
git clone https://github.com/Vimoo-AI/ComfyUI-Vimoo custom_nodes/ComfyUI-Vimoo python -m pip install -r custom_nodes/ComfyUI-Vimoo/requirements.txt - Download the model files. First install the Hugging Face tool "hf". Then download the video model, the text encoders, the image encoder and the VAE, about 38 GB in total. A text encoder turns your text into numbers, and the VAE turns the result into actual frames. The files automatically land in the right subfolders of "models". Don't delete the .json files: the nodes need them.
python -m pip install -U huggingface_hub hf download Vimoo-AI/Vimoo-1.0-Lite-ComfyUI diffusion_models/vimoo_v1_lite_bf16.safetensors diffusion_models/vimoo_v1_lite_bf16.safetensors.vimoo.json text_encoders/vimoo_v1_qwen2_5_vl_7b_bf16.safetensors text_encoders/vimoo_v1_glyph_byt5_fp32.safetensors clip_vision/vimoo_v1_siglip_so400m_fp16.safetensors vae/vimoo_v1_wan22_ti2v_vae_fp32.safetensors --local-dir models - Start ComfyUI. Start ComfyUI with the memory options the source recommends. They let ComfyUI offload parts of the model to system RAM when your GPU doesn't have enough memory. As soon as an address like http://127.0.0.1:8188 appears in the window, open it in your browser. Keep the PowerShell window open.
python main.py --enable-dynamic-vram --async-offload 2 - Open and configure the workflow. In ComfyUI's template browser, open the "vimoo_v1_ti2v_lite" template. In the "Vimoo Model Loader" node, select vimoo_v1_lite_bf16.safetensors and set dtype to bf16. Other settings are rejected. Leave all other connections and defaults as they are.
- Generate your first video. Leave the task in the input node on "t2v" (text to video). Use the prompt that's already in the template or write your own in English. For a quick first test, set the resolution to "manual" and pick a small size, such as 640 × 352, and fewer frames, such as 49. Width and height must be divisible by 16, and the frame count must be 4n + 1. Click "Queue". The finished video will be in ComfyUI\output.
- Result. The ComfyUI/output folder contains a short video you generated from your English text prompt.
macOS
macOS: not supported. According to the source, this ComfyUI version strictly requires an NVIDIA GPU with CUDA, which Macs don't have. The developer does have a separate repo, "Vimoo-1.0-MLX" (github.com/Vimoo-AI/Vimoo-1.0-MLX), for Apple chips. Alternatively, you can use the online API at vimoo.ai.
Linux
Linux: supported. Linux with an NVIDIA GPU and CUDA 13.0 is the setup the source describes. AMD and Intel GPUs aren't supported.
- Check the requirements. You need an NVIDIA GPU, a current NVIDIA driver that supports CUDA 13.0, Python 3.10 or later, and Git. CUDA is NVIDIA's compute interface that lets the model run on the GPU. Plan for about 45 GB of free disk space. "nvidia-smi" shows the CUDA version your driver supports in the top right. It should say 13.0 or higher.
nvidia-smi python3 --version git --version - Download ComfyUI. ComfyUI is the program you use to run the model. Its interface runs in your browser. The command downloads ComfyUI into a folder called "ComfyUI", and "cd" switches into it. Run all the following commands from there.
git clone https://github.com/Comfy-Org/ComfyUI cd ComfyUI - Create a Python environment. A virtual environment (venv) is an isolated folder for Python packages, so it won't interfere with other programs. If activation worked, you'll see "(.venv)" in front of your prompt. You need to activate it again in every new terminal.
python3 -m venv .venv source .venv/bin/activate - Install PyTorch with CUDA 13.0. PyTorch is the compute library the model runs on. The source requires exactly these versions for CUDA 13.0. After that, install the remaining ComfyUI packages. The download is several gigabytes.
python3 -m pip install "torch==2.9.0+cu130" "torchvision==0.24.0+cu130" "torchaudio==2.9.0+cu130" --index-url https://download.pytorch.org/whl/cu130 python3 -m pip install -r requirements.txt - Install the Vimoo extension. The ComfyUI-Vimoo extension provides the Vimoo building blocks (nodes) and ready-made workflows. Install its packages in the same activated environment, or the nodes won't show up later.
git clone https://github.com/Vimoo-AI/ComfyUI-Vimoo custom_nodes/ComfyUI-Vimoo python3 -m pip install -r custom_nodes/ComfyUI-Vimoo/requirements.txt - Download the model files. First install the Hugging Face tool "hf". Then download the video model, the text encoders, the image encoder and the VAE, about 38 GB in total. A text encoder turns your text into numbers, and the VAE turns the result into actual frames. The files go straight into the right subfolders of "models". Don't delete the .json files.
python3 -m pip install -U huggingface_hub hf download Vimoo-AI/Vimoo-1.0-Lite-ComfyUI \ diffusion_models/vimoo_v1_lite_bf16.safetensors \ diffusion_models/vimoo_v1_lite_bf16.safetensors.vimoo.json \ text_encoders/vimoo_v1_qwen2_5_vl_7b_bf16.safetensors \ text_encoders/vimoo_v1_glyph_byt5_fp32.safetensors \ clip_vision/vimoo_v1_siglip_so400m_fp16.safetensors \ vae/vimoo_v1_wan22_ti2v_vae_fp32.safetensors \ --local-dir models - Start ComfyUI. Start ComfyUI with the memory options the source recommends. They let ComfyUI offload parts of the model to system RAM when your GPU doesn't have enough memory. As soon as an address like http://127.0.0.1:8188 appears, open it in your browser. Keep the terminal open.
python3 main.py --enable-dynamic-vram --async-offload 2 - Open and configure the workflow. In ComfyUI's template browser, open the "vimoo_v1_ti2v_lite" template. In the "Vimoo Model Loader" node, select vimoo_v1_lite_bf16.safetensors and set dtype to bf16. FP16 and FP32 are rejected. Leave all other connections and defaults as they are.
- Generate your first video. Leave the task in the input node on "t2v" (text to video). Use the prompt that's already in the template or write your own in English. For a quick first test, set the resolution to "manual", for example 640 × 352, and pick 49 frames. Width and height must be divisible by 16, and the frame count must be 4n + 1. Click "Queue". The video lands in ComfyUI/output.
- Result. The ComfyUI/output folder contains a short video you generated from your English text prompt.
What to do after your first result
- Image to video: set the input node to "i2v" and upload your own image. With resolution=auto, it's scaled to about 1280 × 720 and center-cropped.
- Test faster: the distilled adapter speeds things up. Also download loras/vimoo_v1_ti2v_distilled_lora_fp32.safetensors along with its .json file into the models folder using hf download, then open the "vimoo_v1_ti2v_lite_distilled" template. Copy its sample image, the sourdough loaf, from custom_nodes/ComfyUI-Vimoo/assets to ComfyUI/input.
- Full quality: the defaults are 1280 × 720 pixels and 121 frames at 24 fps. Write detailed prompts in English covering subject, scene, action and camera movement.
- If you get memory errors while converting to frames (decoding), turn on tiled_decode in the "Vimoo Output VAE" node. The video is then processed in tiles and needs less memory.
Try it
A red fox walks slowly through a snowy forest at sunrise, soft golden light, the camera follows at ground level.Close-up of a cup of coffee on a wooden table, steam rising, rain running down the window in the background, slow push-in camera movement.(Image-to-video with your own vacation photo) The waves gently roll onto the beach, palm leaves sway in the wind, clouds drift slowly across the sky.An old man in a workshop carefully sands a wooden violin, sawdust floating in a beam of sunlight, the camera slowly circles around him.A futuristic city at night seen from a drone flying between skyscrapers, neon reflections on wet streets, cars with glowing headlights moving below, smooth forward tracking shot.Tips for better results
- Write detailed English prompts covering subject, setting, action and camera movement instead of just a few keywords.
- In the distilled workflow, leave CFG at 1 and the saved sampling schedule unchanged, and use only the positive prompt.
- Always keep the generation FPS and the video output FPS the same (default 24), or the video will play too fast or too slow.
- For image-to-video, use a starting image in the aspect ratio you want. With resolution=auto, you'll automatically get the matching video format.
- Optionally install FlashAttention or SageAttention and select it in the Vimoo Performance Options to speed things up. PyTorch SDPA is used by default.
If something goes wrong
The Vimoo nodes are missing? ComfyUI has to be at least version 0.34.0, ComfyUI-Vimoo has to be in custom_nodes, and then you need to restart ComfyUI and reload the browser.
Errors at startup or with CUDA: it expects exactly PyTorch 2.9.0 with CUDA 13.0 (cu130), plus torchvision 0.24.0 and torchaudio 2.9.0, and a suitably recent Nvidia driver.
The model won't load or the settings are wrong: the .vimoo.json and .json files have to sit right next to their weights files.
The Vimoo Model Loader must be set to dtype=bf16. FP16 and FP32 are rejected.
Create a separate Python environment for the Diffusers examples, because they need a different Transformers version than ComfyUI.
Non-English prompts haven't been tested and may give worse results, so translate them into English first.
“out of memory,” a crash, or your computer freezes
The model is too big for your VRAM (video memory). Pick a smaller variant from the table above and close other programs, especially games and browsers with lots of tabs.
It runs, but extremely slowly
Your CPU is probably doing the work instead of your graphics card. In Ollama, the PROCESSOR column of ollama ps shows how much runs on the GPU. If it says "100% CPU", update your graphics driver or pick a smaller variant that fits entirely into VRAM (video memory).
“ollama” or “python” is not found
Close the terminal window and open it again so it recognizes the newly installed program. For Python on Windows: reinstall it and check Add python.exe to PATH.
Windows: "Running scripts is disabled on this system"
Run the script with exactly the command above: powershell -ExecutionPolicy Bypass -File try_windows.ps1. This allows execution for this one time only.
Error message when loading the model (version, "trust_remote_code", unknown architecture)
Brand-new models often need the latest software version. With Ollama: update Ollama. With Python: pip install -U transformers in the activated environment. The Model Card usually lists the exact version.
Tokenstrom generates the scripts and notebook automatically. Please take a quick look before running them – they're plain, readable text. Mind the model's license: apache-2.0.
Ask the AI assistant
Questions about this article, installation or background? Our assistant knows this page and runs on our own machine, not in someone else's cloud.
The Assistant is an AI (Gemma 4) and can make mistakes – please check important details against the source. Questions are used only to generate an answer and are deleted after one hour. Please don't enter any personal data.

Comments
What do you think? Already tried it? Write it here, no sign-up needed.
Comments are public. Links aren't allowed, and we delete abusive posts. You can delete your own comment at any time in this browser. Learn more in the Privacy Policy.