
vivo's BluePixel-Turbo edits images in native 4K with just 4 steps
Smartphone maker vivo has released BluePixel-Turbo, a model that edits images in native 4K from a text instruction. Thanks to distillation, it needs only 4 compute steps instead of 50. According to the maker, a 4K edit takes 8.7 seconds on a Chinese AI accelerator.
What this is about
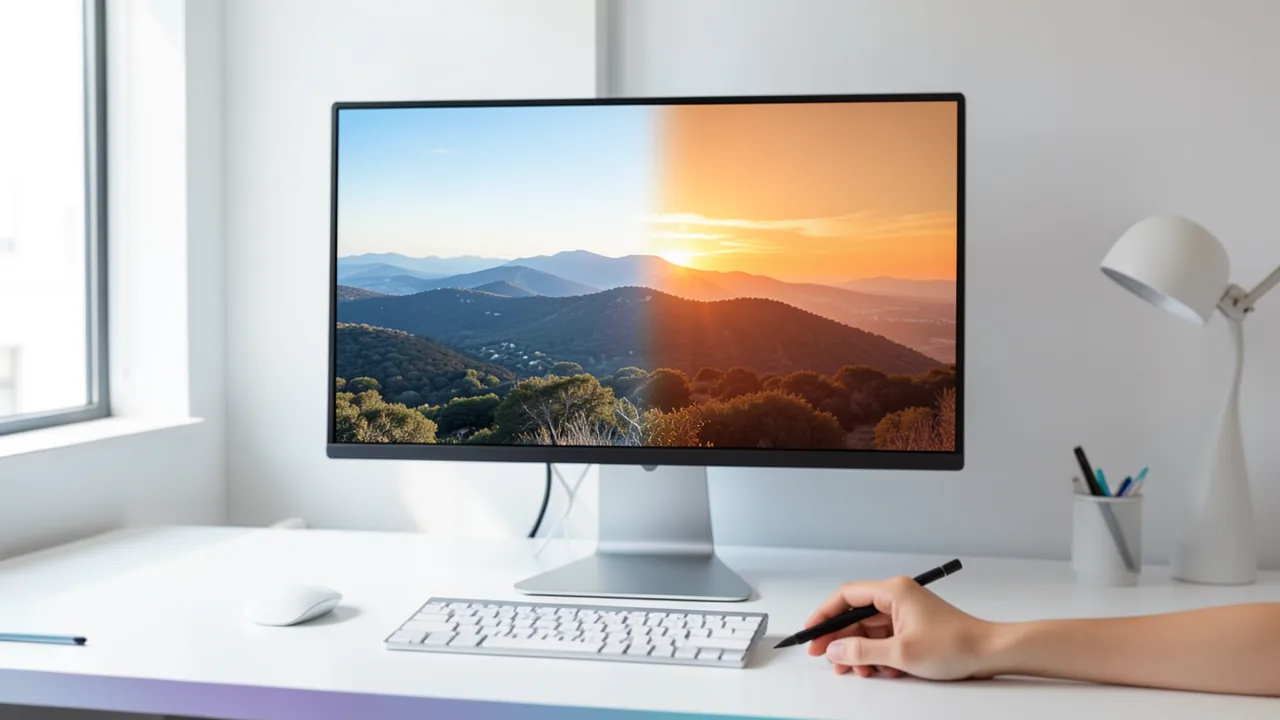
vivo, best known as a smartphone maker, has released the model BluePixel-Turbo on Hugging Face. It is the distilled, i.e. accelerated, version of the system "BluePixel: Toward Native 4K Agentic Image Editing". You give the model an image and a text instruction (for example "Make the sky sunset orange and add warm light"), and it returns the edited image directly in 4K resolution. It is available through Hugging Face, Diffusers, and Colab and Kaggle notebooks. The code is on GitHub, along with a project page, a paper, and a dataset.
How it works
BluePixel-Turbo builds on FLUX.2-klein-9B and pairs it with a DCAE-F64 autoencoder. An autoencoder is the component that packs images into a compact internal representation and converts them back. Here it compresses heavily (a factor of 64), which is meant to make 4K editing efficient. As a result, the output is native 4K, with no cascaded super-resolution step in which a small image is upscaled after the fact.
The speedup comes from distillation: a large "teacher model" needs 50 compute steps, while the "student model" learns to reach the same result in 4. The method is called "source-anchored target projection" (SATP). The maker also mentions "ACE-MOPD", which is used to learn rare editing abilities, followed by reinforcement learning for aesthetics and instruction following. Important: according to the maker, the current version is an interim checkpoint without additional post-training. The reinforcement learning is planned for later.
Speed and benchmarks
According to the project page, a 4K edit takes 8.7 seconds on a single Kunlunxin P800 XPU (BF16). Latency depends heavily on the hardware, and no figures are available for consumer GPUs.
| Benchmark | Metric | Result |
|---|---|---|
| VINS-4KEval++ | Overall | 8.62, 2nd of 7 models |
| VINS-4KEval++ | Consistency of unedited regions | 9.06 |
| ImgEdit-Bench | Hybrid / Action | 4.59 / 4.93, 1st place in both |
| CIE-Bench | Overall before → after ACE-MOPD | 6.24 → 8.87 |
The Model Card points out that the project page reports quality scores for BluePixel as a whole and doesn't clearly attribute them to this Turbo checkpoint. These are also vendor figures with no independent verification.
Versions and update
Version 1 was an SFT checkpoint (ckpt800). Version 2 (current, November 3, 2026) is the checkpoint ckpt35 (STEP-35). Only the transformer weights (10 shards) were replaced. The text encoder, VAE, and tokenizer are unchanged. The architecture stays the same (233 tensors, 36,314,324,992 bytes). The weights are stored in float32. The "torch_dtype: bfloat16" entry in the config only describes the intended inference data type. Earlier versions can be retrieved through the revision history.
What you need to try it
The Model Card calls for a CUDA environment with BF16 support. The transformer weights alone are about 36 GB (float32), and the text encoder and VAE come on top, so plan for well over 40 GB of disk space. The source gives no concrete VRAM (video memory) figures. Setting vae_tiling=True reduces the autoencoder's memory use. The Diffusers examples also mention "mps" for Apple devices, but whether that runs cleanly with this pipeline is undocumented. Colab and Kaggle notebooks are linked. To install, clone the repository, run pip install -r requirements.txt, update Diffusers, then use load_pipeline from vins_infer. The pipeline roughly preserves the aspect ratio and snaps dimensions to multiples of 64.
Our take
Native 4K editing in just 4 steps is interesting for local image AI, because quality and speed have mostly been a trade-off so far. The benchmarks are vendor numbers, and the speed was measured on specialized hardware that hardly anyone has at home. Keep in mind that the model is only an interim checkpoint, expects English instructions, and can produce artifacts or unwanted changes. The source doesn't explicitly state the license. If you want to test instruction-based image editing locally, this is a promising candidate, but wait for hands-on tests from the community.
Related videos
Sources
- Reddit: lokale Modelle & Bild-KI huggingface.co
Try it yourself: BluePixel-Turbo
Explained step by step, no prior knowledge needed – on your own computer or free in your browser.
What can I do with it?
BluePixel-Turbo edits existing images from a text instruction, for example recoloring a sky, swapping objects, or changing the lighting. Output is native 4K, with no upscaling. Thanks to distillation, 4 steps are enough instead of 50. According to the benchmark, areas that shouldn't change are preserved well. It is built for English instructions. The current version is an interim checkpoint, so artifacts or unwanted changes can occur. The source offers no comparisons with well-known alternatives, only vendor benchmarks.
Who is it worth it for?
Interesting for tinkerers, photographers, and image-AI fans with a CUDA GPU who want to test instruction-based editing at high resolution. Less suitable for beginners without Python experience or those with a weak graphics card.
Ideas: What you can do with it
Load a photo and ask for warmer light or a sunset sky. The result comes back in high resolution.
Change a product's background or color with an instruction, no manual masking required.
Play with moods, seasons, or weather on the same scene.
Quickly tweak image elements and export in high quality right away.
What your computer needs
There is only one repository, with the current version (v2). Older revisions are reachable through the commit history. The source mentions no quantized variants. If VRAM is tight, vae_tiling=True helps.
- A CUDA environment with BF16 support is required.
- The transformer weights alone are about 36 GB (float32), so plan for over 40 GB of disk space.
- vae_tiling=True reduces the autoencoder's memory use.
- The 8.7 seconds apply to a Kunlunxin P800 XPU. Times will vary on other hardware.
- Notebooks for Google Colab and Kaggle are linked.
How do I find out what my computer has?
- Windows: Press Ctrl + Shift + Esc → Task Manager → Performance tab → click GPU on the left. At the bottom you'll see Dedicated GPU memory (that's your VRAM). You'll find system memory under Memory.
- Mac: Apple menu at the top left → About This Mac. You'll see your chip (e.g. M2) and memory (e.g. 16 GB). On Apple chips, graphics and processor share this memory.
- Linux: Type
nvidia-smiin the terminal (shows your graphics card and its memory) andfree -hfor system memory.
Guide
Google Colab (in your browser, no installation)
Google Colab is a free service from Google. It gives you a computer with a graphics card in your browser for a few hours. All you need is a Google account. For this model: Colab Pro only – Free Colab has only 12.7 GB of RAM – not enough for this model.
- Download the notebook. Click the button and save the file.
- Open Colab. Go to colab.research.google.com and sign in with your Google account.
- Upload the notebook. In the window that appears, click Upload on the left (or choose File → Upload notebook at the top) and select the file
colab.ipynb. - Turn on the GPU. In the top menu, go to Runtime → Change runtime type → under Hardware accelerator, select T4 GPU (with Colab Pro: L4 or A100) → Save.
- Start everything. Runtime → Run all (keyboard shortcut Ctrl + F9). If you see the warning “This notebook was not authored by Google,” click Run anyway.
- Wait. The cells run one after another. A green checkmark appears to the left of each cell when it's done. Installation and download take about 22 minutes here.
- Try it out. The result appears below the last cell. To test something else, change the text in the cell and run it again with Shift + Enter.
- Clean up. When you're done: Runtime → Disconnect and delete runtime. This saves your free quota.
Good to know: The free GPU is limited (usually a few hours per day). After about 90 minutes of inactivity, Colab disconnects, and you'll have to start everything over.
Windows 10 / 11
This model runs on Python. Our script handles the setup automatically: it creates an isolated Python environment, installs the required packages (PyTorch, approx. 3 GB) and downloads the model (55 GB (about 74 min at 100 Mbit/s)).
- Update your graphics driver (NVIDIA): install the latest driver. Without an NVIDIA card, it runs on the CPU – much more slowly.
- Install Python. Download Python 3.12 from python.org and run the installer. Important: At the bottom of the first window, tick Add python.exe to PATH, then click Install Now.
- Create a folder and download the files. Create a folder, e.g.
Documents\AI-Test, and save both files into it: - Open a terminal in the folder. Open the folder in File Explorer, right-click an empty spot → Open in Terminal.
- Run it. Paste this command and press Enter:
Installation and download are running now. The first time, this can take 10–30 minutes.powershell -ExecutionPolicy Bypass -File try_windows.ps1 - Result. The folder now contains the generated image
output.png. - Try your own input: Open
demo.pyin an editor, change the sample text, and save. Then run this in the terminal:.\.venv-bluepixel-turbo\Scripts\Activate.ps1 python demo.py
macOS
Macs with an Apple chip (M1 to M5) are ideal. Older Intel Macs are very slow.
- Open Terminal. Press Cmd + Space, type Terminal, and press Enter.
- Install the developer tools (first time only; includes Python):
Click Install in the window. If you see "already installed," everything is already in place.xcode-select --install - Download the files – both end up in your Downloads folder:
- Run it:
The first time, installation and download take 10–30 minutes.cd ~/Downloads bash try_mac.sh - Result. The folder now contains the generated image
output.png.
Linux
- Check your GPU.
nvidia-smishould show your card. If it doesn't, install the driver on Ubuntu and restart:sudo ubuntu-drivers install - Install the Python basics (Ubuntu/Debian):
sudo apt update && sudo apt install -y python3-venv python3-pip git - Put the files in a folder and open a terminal there:
- Run it:
bash try_linux.sh - Result. The folder now contains the generated image
output.png.
Try it
Make the sky sunset orange and add warm light.Turn this cat into a dog.Remove the person on the left and fill the background naturally.Change the jacket to dark green leather and keep everything else unchanged.Convert the daytime street scene into a rainy night with neon reflections.Tips for better results
- Start with num_inference_steps=4 and guidance_scale=3.0, as in the example.
- Set a fixed seed so you can compare results.
- Lower target_pixels if memory gets tight.
- Write clear, single edit instructions rather than many at once.
If something goes wrong
The model runs through its own pipeline in the GitHub repository (vins_infer), not through the plain standard Diffusers pipeline.
You need a recent Diffusers version with FLUX.2 components, otherwise the import fails.
Phrase your instructions in English for best results.
The download is very large because of the float32 weights.
Always check the results, since unwanted changes are possible.
“out of memory,” a crash, or your computer freezes
The model is too big for your VRAM (video memory). Pick a smaller variant from the table above and close other programs, especially games and browsers with lots of tabs.
It runs, but extremely slowly
Your CPU is probably doing the work instead of your graphics card. In Ollama, the PROCESSOR column of ollama ps shows how much runs on the GPU. If it says "100% CPU", update your graphics driver or pick a smaller variant that fits entirely into VRAM (video memory).
“ollama” or “python” is not found
Close the terminal window and open it again so it recognizes the newly installed program. For Python on Windows: reinstall it and check Add python.exe to PATH.
Windows: "Running scripts is disabled on this system"
Run the script with exactly the command above: powershell -ExecutionPolicy Bypass -File try_windows.ps1. This allows execution for this one time only.
Error message when loading the model (version, "trust_remote_code", unknown architecture)
Brand-new models often need the latest software version. With Ollama: update Ollama. With Python: pip install -U transformers in the activated environment. The Model Card usually lists the exact version.
Tokenstrom generates the scripts and notebook automatically. Please take a quick look before running them – they're plain, readable text. Mind the model's license: apache-2.0.
Ask the AI assistant
Questions about this article, installation or background? Our assistant knows this page and runs on our own machine, not in someone else's cloud.
The Assistant is an AI (Gemma 4) and can make mistakes – please check important details against the source. Questions are used only to generate an answer and are deleted after one hour. Please don't enter any personal data.


Comments
What do you think? Already tried it? Write it here, no sign-up needed.
Comments are public. Links aren't allowed, and we delete abusive posts. You can delete your own comment at any time in this browser. Learn more in the Privacy Policy.